
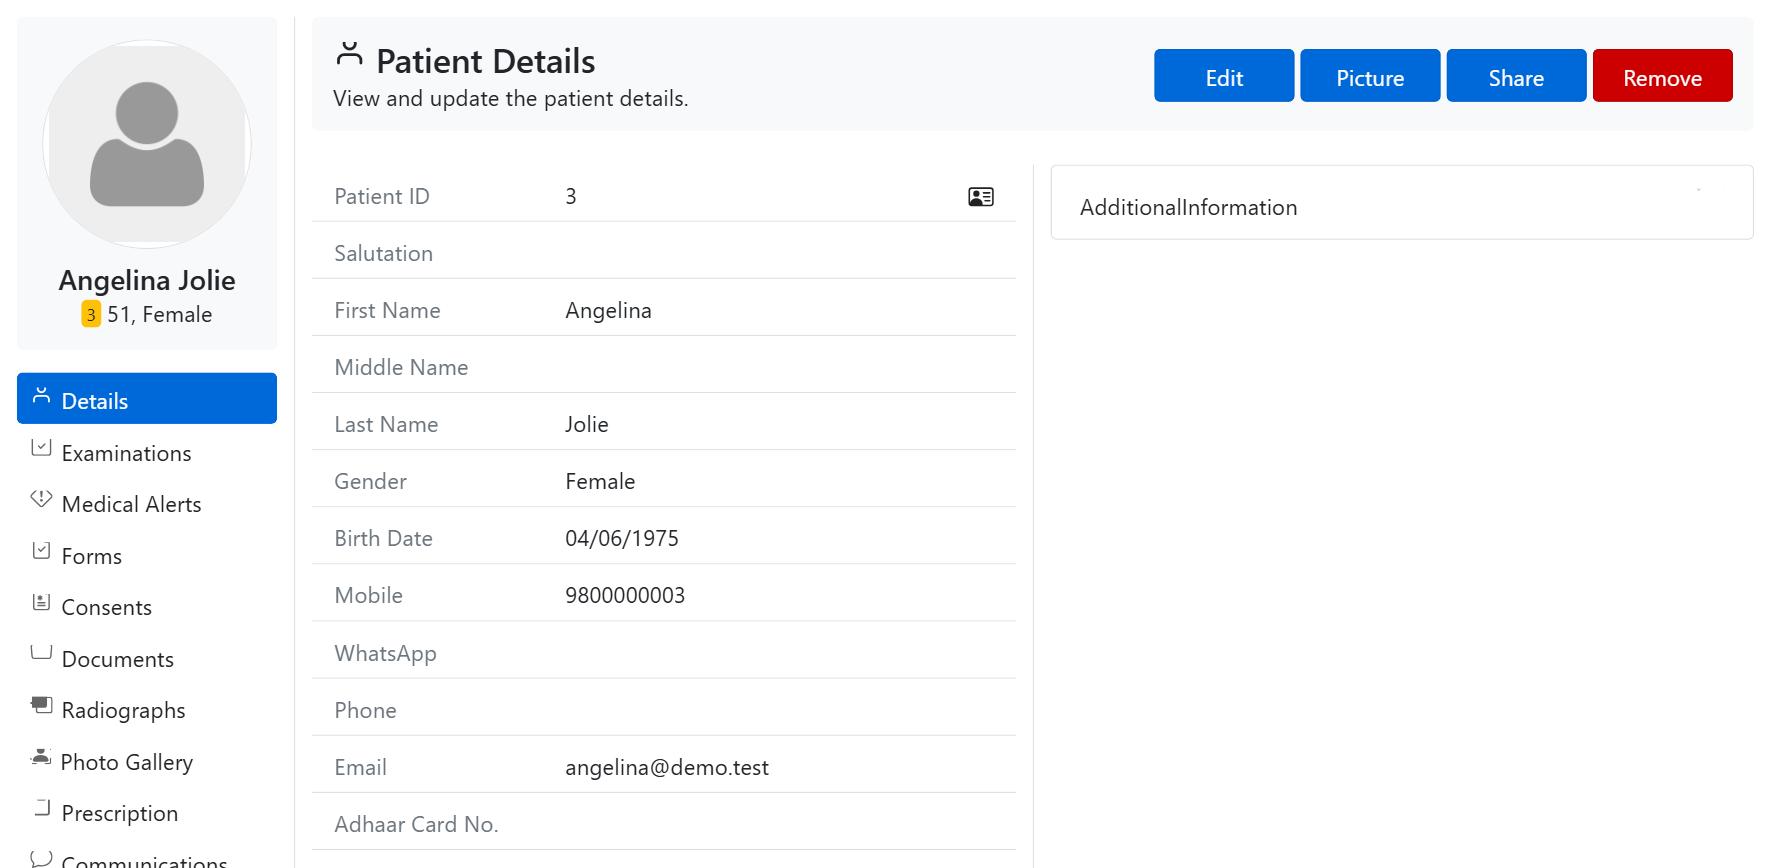
Clicking a patient’s name opens their patient record — the single, complete view of everything your clinic knows about that person. The left sidebar lists every section of the patient’s file, and the main area shows whichever section you select. This is where clinicians and front-desk staff spend most of their time.
Top actions on the patient record
Along the top of the record you will find quick actions that apply to the whole patient:
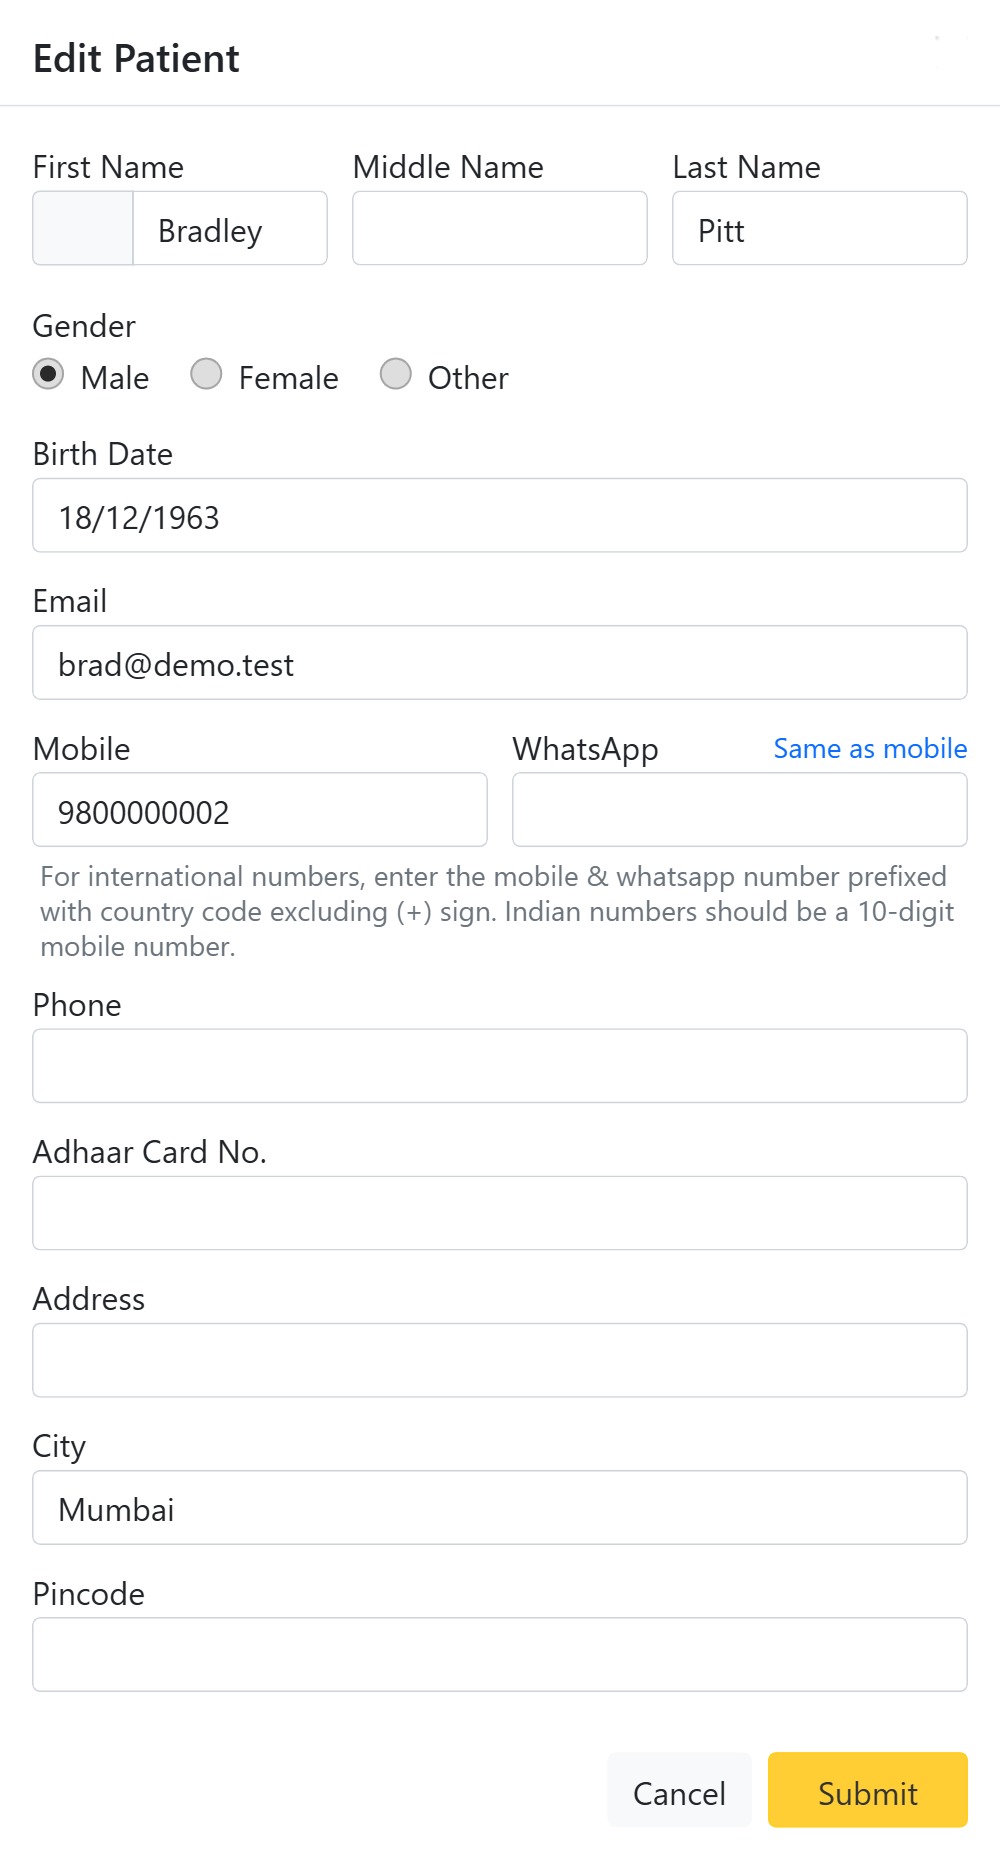
- Edit — open an editable form to correct or update the patient’s demographics and contact details.
- Picture — upload or change the patient’s profile photograph, which then appears throughout the record.
- Share — share the patient with another clinic or user, useful for referrals and multi-branch practices.
- Remove — deactivate the patient when they are no longer active at your practice.
- Print Id Card — print a patient ID card.
- Additional Information — expand this panel for extra demographic fields.
Sections of the patient record (left sidebar)
Each item in the sidebar opens a dedicated part of the patient’s file:
- Details — demographics, contact information and additional details.
- Examinations — recorded clinical examinations.
- Medical Alerts — allergies and conditions that affect treatment.
- Forms and Consents — completed intake forms and signed consents.
- Documents — uploaded files such as ID, insurance and referral letters.
- Radiographs — the patient’s X-rays, organised by type.
- Photo Gallery — clinical photographs by procedure.
- Prescription — prescriptions written for the patient.
- Communications — the SMS and WhatsApp messages sent to the patient.
- Appointments, Treatments and Labworks — the patient’s history in each of those modules, filtered to just this patient. They work exactly like the main Appointments, Treatments and Labwork modules.
Top actions: Edit, Picture & Share
The buttons at the top of a patient record are the everyday power actions for that person.
Edit
Edit opens the patient’s full details for correction — Salutation, First / Middle / Last name, Gender, Date of birth, Email, Mobile, WhatsApp, Phone, UID, and Address / City / Pincode. Save and the record (and everywhere the name shows) updates immediately.
Picture
Picture opens an uploader to add or replace the patient’s photo. Choose an image and crop it before saving; the photo then shows on the record, in the appointment popovers and wherever the patient appears, making them easy to recognise at the chair and front desk.
Share
Share makes this patient available in another of your clinics — useful for a multi-branch practice or when a patient is seen at more than one location. The Patient Sharing dialog lets you pick the destination clinic and choose exactly what travels with the patient.
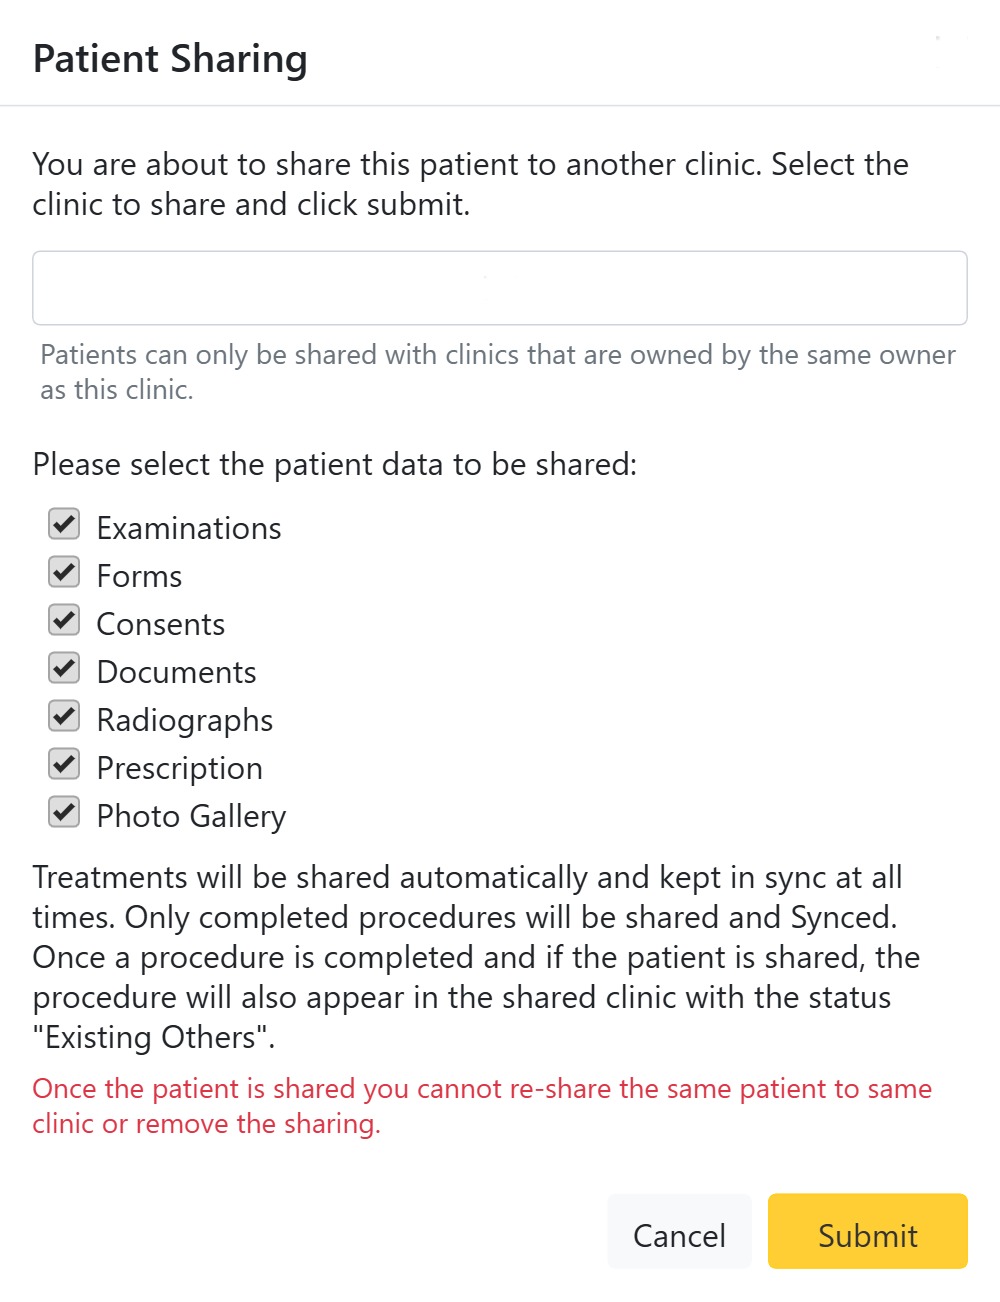
- Choose the clinic — you can only share with clinics owned by the same owner as this one.
- Choose what to share — tick the data categories to include: Examinations, Forms, Consents, Documents, Radiographs, Prescription and Photo Gallery.
- Treatments are shared automatically and kept in sync — only completed procedures cross over, and they appear in the other clinic with the status “Existing Others”.
Sharing is one-way and permanent: once a patient is shared to a clinic you cannot re-share the same patient to that clinic or undo the sharing — so confirm the destination and the data selection before you submit. A Sharing Information link on the record shows its shared status (shared out, or shared in from another clinic), so it is always clear where a patient originated.