The Photo Gallery stores a patient’s clinical photographs and keeps them organised by the treatment they document. It is built for the way dentistry actually uses images — recording a condition, and showing the result — with a built-in editor so photos go in straight and tidy.
Adding photographs
Click Add and choose one of two modes:
- Single photograph — add one clinical image.
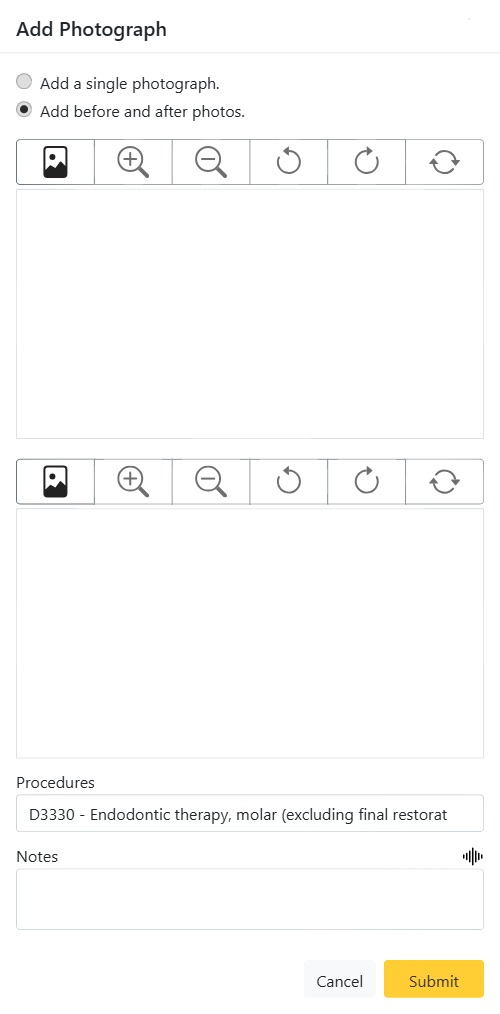
- Before and after — add a matched pair side by side, the classic way to show a treatment result.
The built-in image editor
Each image has its own toolbar so you can get it right before saving, without a separate photo app: select the file, zoom in / out, rotate left / right, and reset all changes. Supported files are jpg, jpeg and png.
Linking a photo to a procedure
Every photo (or pair) can be attached to a Procedure from the patient’s treatments, and given Notes (with speech-to-text). Linking by procedure is what powers the practice-wide Photo Gallery on the Patients list, where you can browse clinical images across all patients by procedure — invaluable for case studies, treatment discussions and marketing (with consent).
Viewing photos
Saved photos appear as a gallery on the patient’s tab and open in a full-screen lightbox for close inspection. Each entry can be edited or removed later.