
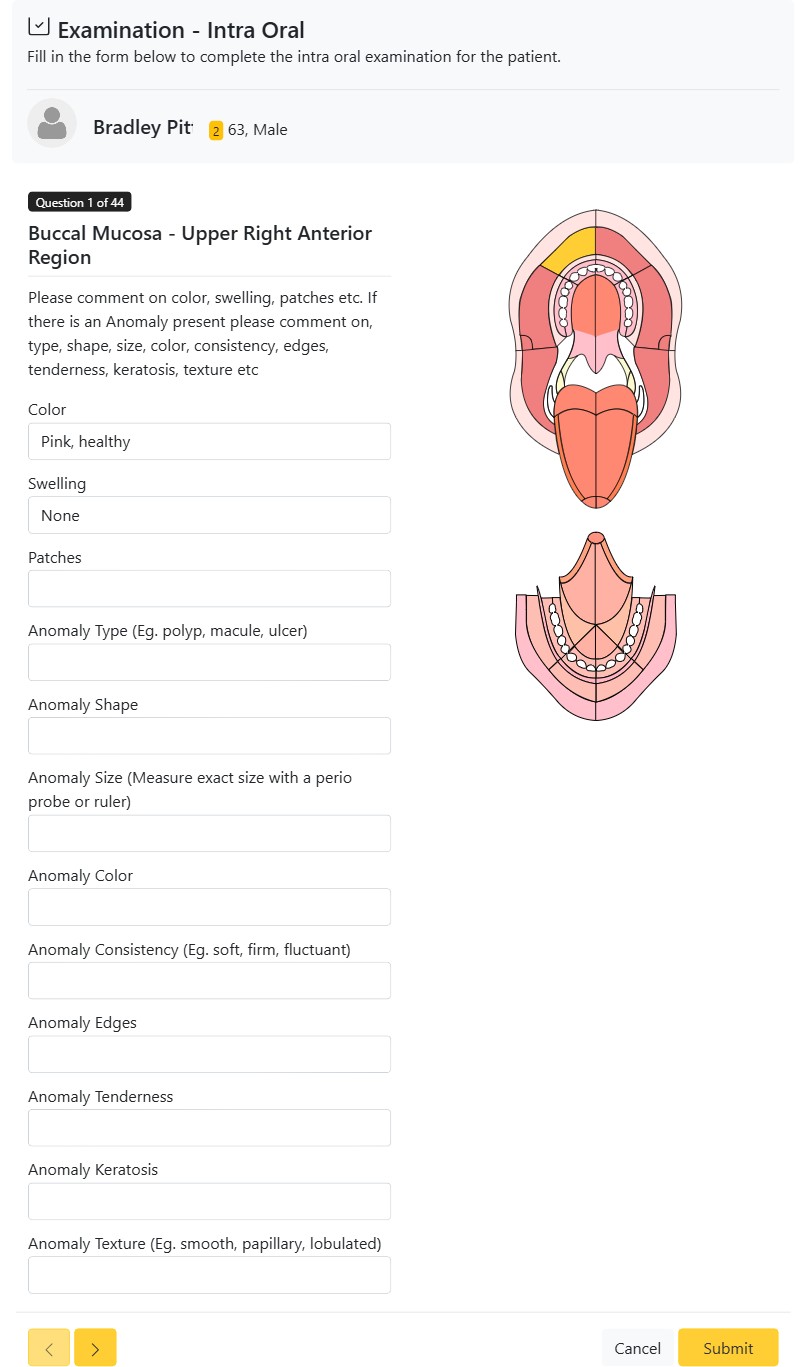
The Intra Oral examination is the most detailed of the three formats: a guided, 44-step assessment of the soft tissues inside the mouth, supported by a clickable oral-anatomy map that highlights exactly which region you are recording. It gives every clinician in the practice a repeatable way to perform a thorough intra-oral soft-tissue screening — the sort of systematic check that underpins early detection of oral disease.
The oral-anatomy map
Alongside the questions, the examination shows a colour-coded diagram of the mouth divided into regions. As you move through the steps the current region is highlighted, and you can click a region on the map to jump straight to it. This keeps a long examination oriented — you always know whether you are looking at the upper-right buccal mucosa, the soft palate, or the lateral border of the tongue.
What the Intra Oral examination covers
The 44 steps sweep systematically around the mouth, left and right, upper and lower, and include:
- Buccal mucosa — anterior and posterior regions, each quadrant.
- Lips and lip commissures.
- Vestibule — anterior and posterior.
- Palate — hard palate and soft palate.
- Oropharynx and tonsils.
- Tongue — tip, anterior two-thirds, posterior third, and lateral borders.
- Floor of mouth and the remaining intra-oral soft-tissue regions.
Two kinds of step
Depending on the region, a step either offers a Normal / presence-of checklist — tick Normal, or select findings such as ulcers, swelling, patches, tenderness, coating, cyanosis or lesions — or a set of descriptive fields for a detailed write-up: colour, swelling, patches, and for any anomaly its type, shape, size, colour, consistency, edges, tenderness, keratosis and texture. Tongue regions add shape, texture, consistency, papillae and scalloping. Ticking Normal clears the other options, so a healthy region is a single click.
How to complete an Intra Oral examination
- On the Examinations tab, click New → Intra Oral.
- Work through each region using the progress badge and the anatomy map to stay oriented.
- Confirm Normal where there is nothing to note, or describe the finding where there is.
- Save — the completed examination is filed on the Examinations tab with the date and your name, and is available as a PDF for records or referral.