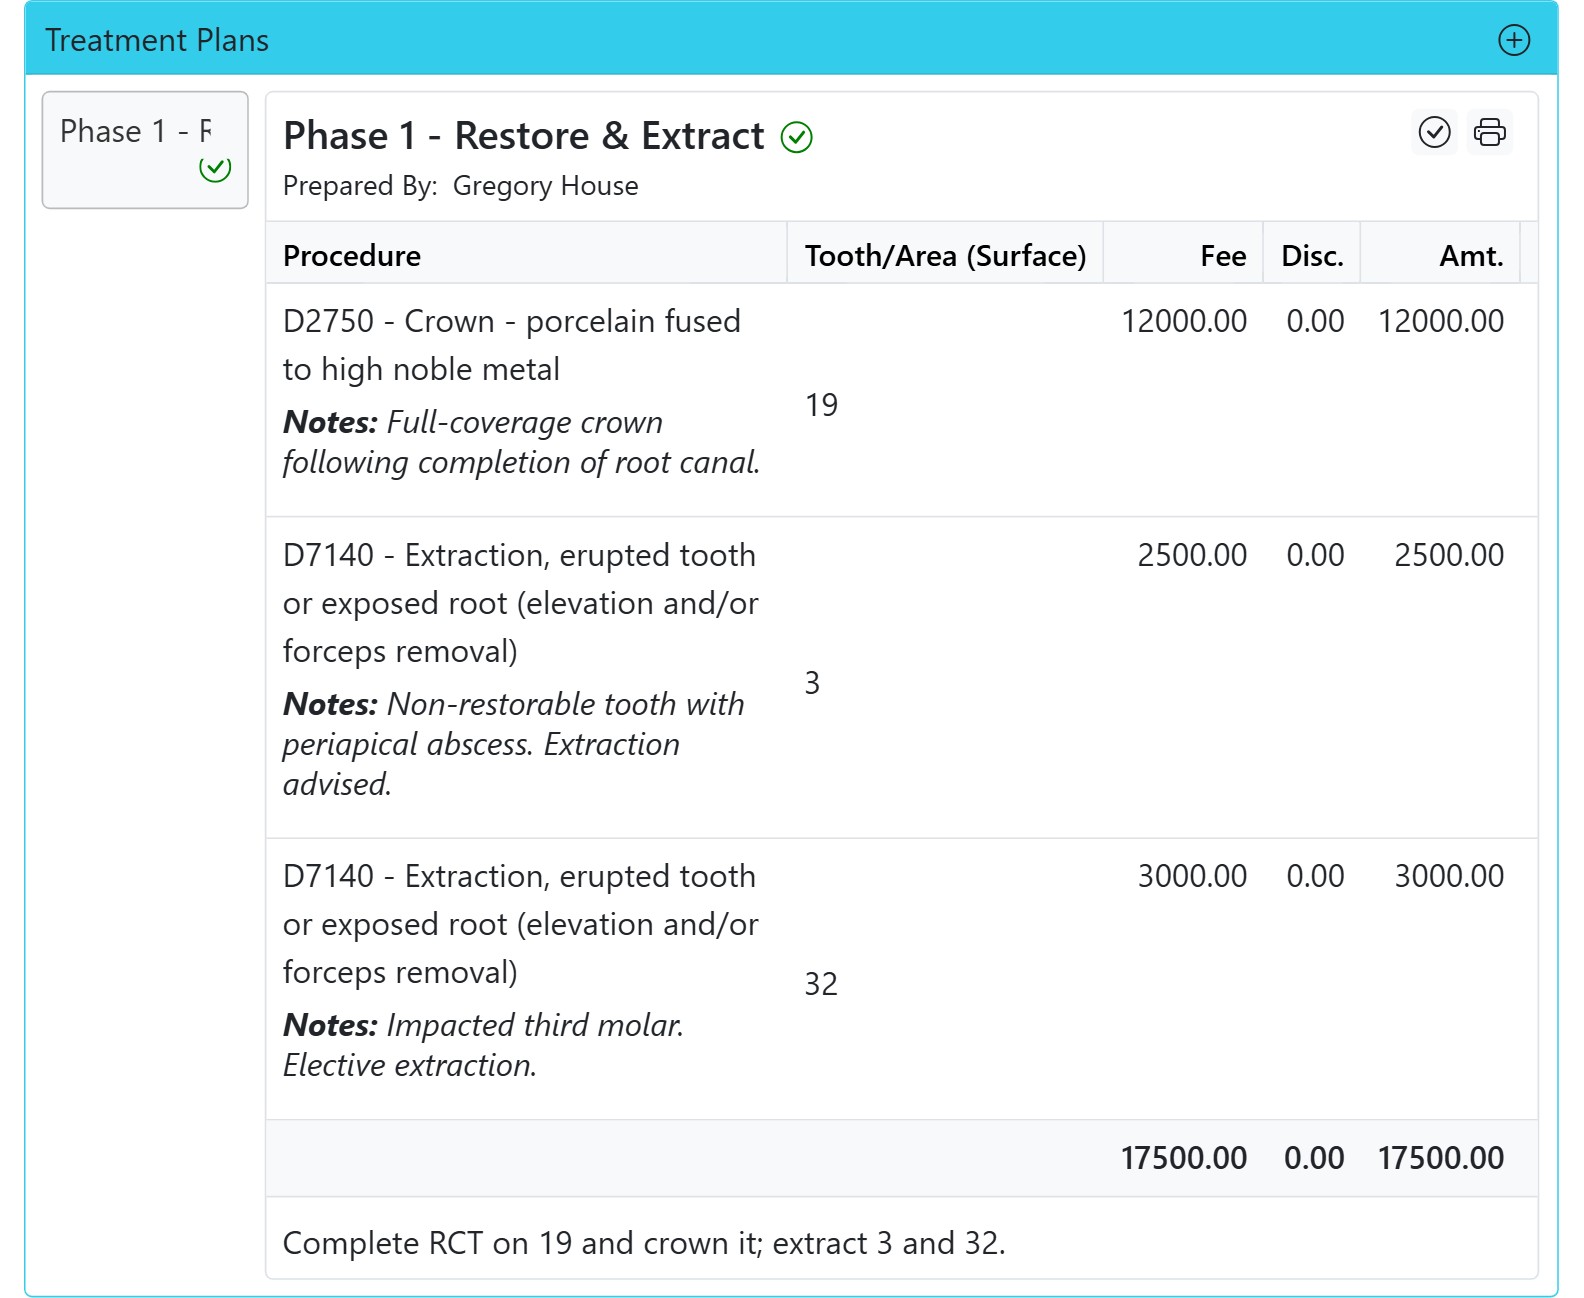
A treatment plan turns a set of planned procedures into a single, presentable proposal for the patient — itemised, priced and totalled — that you can get approved and then work through. It is how you communicate “here is what we recommend, and what it costs” clearly and professionally.
How to create a treatment plan
- First, plan the procedures you want to include by selecting teeth on the tooth chart and adding them (they appear under Planned Procedures).
- Open the Treatment Plans tab and click Add Treatment Plan (the +).
- Give the plan a name (for example “Phase 1 – Restore & Extract”), tick the procedures to include, add a remark if useful, and save.
The saved plan lists each procedure with its tooth, fee, discount and amount, shows a grand total, and records who prepared it.
Getting the plan approved
Plans carry an approval status so everyone knows where consent stands:
- Planning — still being drafted.
- Send for approval on mobile — push the plan to the patient to approve on their phone.
- Self approved — approved at the chair (for example, verbally in the surgery).
- Approved on mobile by patient — the patient approved it digitally.
- Disapprove — the patient declined.
An approved plan is marked with a green tick. You can also sign and print the plan for your records or to hand to the patient.
Editing a plan
You can rename a plan, add or remove procedures, or delete the plan entirely. Removing a procedure from a plan does not delete the procedure itself — it simply takes it out of that plan.