
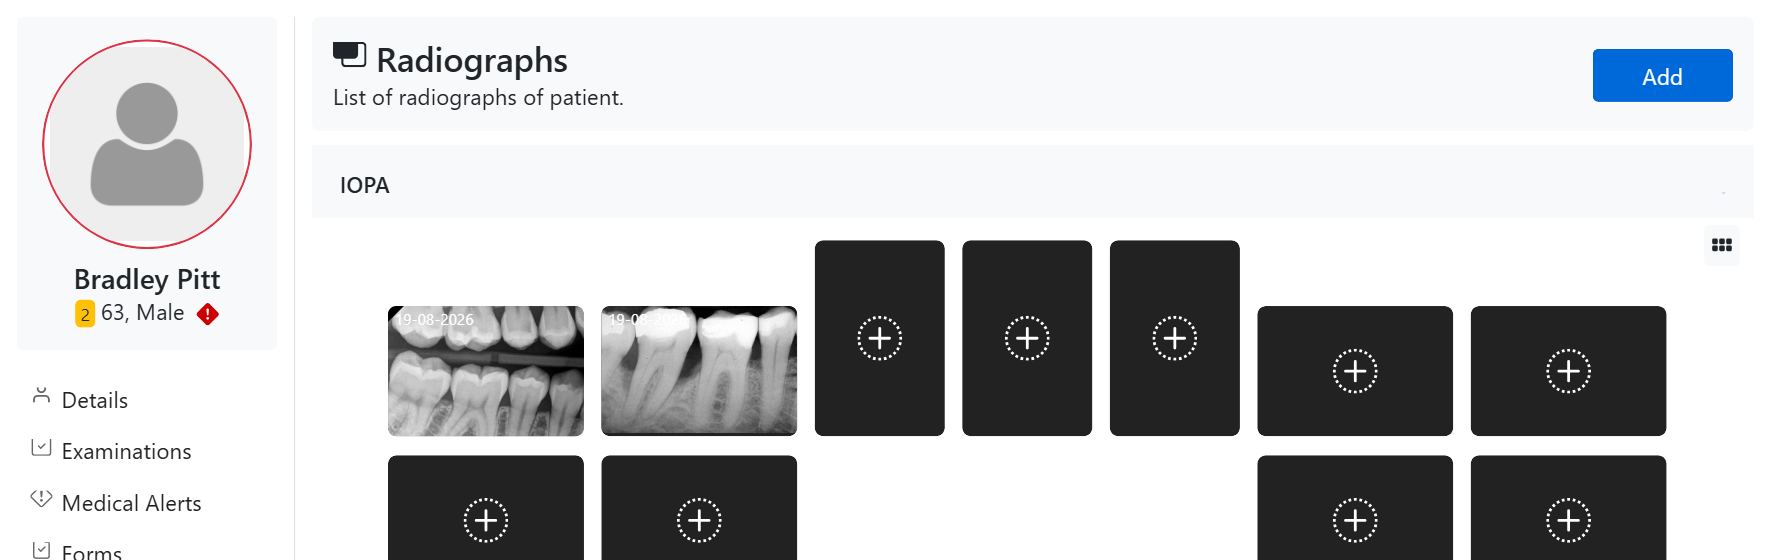
The Radiographs section stores the patient’s X-rays and, crucially, organises them the way clinicians actually think about them — by radiograph type and, for intra-oral films, by tooth position on a full-mouth layout. This makes it quick to pull up exactly the right image during diagnosis and to compare films taken at different visits.
How radiographs are organised
Films are grouped into collapsible accordions by category:
- IOPA (intra-oral periapical) — shown on a full-mouth map. Each position has its own slot: Molar, Premolar, Canine and Anterior for every quadrant (right/left, upper/lower), plus the four Bitewing positions. A slot with a film shows the image and the date it was taken; an empty slot shows a dotted + to add one. This layout lets you see at a glance which teeth have been imaged and where a gap remains.
- Occlusal — Maxillary and Mandibular.
- OPG — the panoramic view.
- Miscellaneous — any other image that doesn’t belong to a fixed position; this category can hold many films.
Two ways to view a category
The IOPA (and other) categories offer a View Structure / View List toggle in the top-right of the panel. Structure shows the anatomical full-mouth map described above; List shows the same films as a simple gallery when you just want to scroll through them. Miscellaneous, which can contain many images, is best browsed as a list.
Viewing and comparing films
- Zoom — click any film to open it in the image viewer with magnification, so you can inspect fine detail without leaving the record.
- Caption and date — each film carries its position label, the date it was taken and any remark you added, so a film is never ambiguous.
- Compare over time — because the newest film sits in each position slot, and older films for that position are kept, you can track a tooth across visits.
Adding a radiograph
Click Add (top-right), or the dotted + on a specific position to pre-select that slot. This opens the Add Radiograph window, where you choose the category and date and bring in the image. CAPS28 supports three ways to get an image in — picking a file manually, watching a folder your imaging software exports to, or capturing straight from a sensor. See Upload a radiograph for the full walkthrough.
Three ways an X-ray reaches the record
CAPS28 is built to get radiographs onto the patient record with as little friction as possible. The RVG-Bridge helper is what makes this seamless — capture in your imaging software and the image lands here on its own, with no manual export or file-hunting:
- Folder watch (via RVG-Bridge) — point the Bridge at your imaging software’s export folder. Take the X-ray exactly as you do today and the new image appears here as a preview automatically, ready to save against the patient — no capture button, no uploading.
- Direct sensor capture (via RVG-Bridge) — connect a TWAIN X-ray sensor or RVG unit straight through the Bridge and trigger the exposure; the captured image flows onto the record on its own.
- Manual upload — the always-works fallback with no extra software: choose a category and date and pick the image file.
See Upload a radiograph for the step-by-step, and RVG-Bridge to set up folder watch and direct sensor capture.